 How-to
7 Steps to Installing Heavy Duty Workshop Doors
Last Updated: November 5, 2026
Quick Summary
Installing heavy duty workshop doors starts with checking the opening for plumb, level, and square, and confirming the header, jambs, and floor anchors can carry the load. Then measure the rough opening, mount the guides and brackets, lift the door assembly with a planned crew, and finish with tension, balance, and seal checks.
- Fix out-of-square framing before installation, or the door will bind in the guides.
- Use two people minimum for the curtain and three for a wide or insulated door.
- Measure width at top, middle, and bottom, and use the smallest reading.
- Standard side clearance runs between 4 1/2 and 7 inches depending on track and door type.
- A balanced door stays put when lifted halfway by hand; one that drops or climbs needs adjustment.
Table of Contents
- Before You Start: Safety and Structural Assessment
- Roll Up Door Installation Tools and Materials
- Measuring the Opening for Your Workshop Doors
- Mounting the Guides and Brackets
- Lifting and Securing the Door Assembly
- Commercial Roll Up Door Installation: Electrical and Opener Integration
- Roll Up Door Tension Adjustment and Balance Check
- Your Roll Up Door Installation Diagram: Post-Install Checks and Sealing
- Frequently Asked Questions
Before You Start: Safety and Structural Assessment
Installing heavy duty workshop doors starts long before the first bracket goes up. It starts with an honest look at the opening, the structure around it, and the people doing the lift. A roll-up door is only as good as the frame it hangs on. Get this assessment right and the rest of the job moves fast. Skip it and you will fight alignment problems for weeks.
Check the Opening and Surrounding Structure
Walk the opening with a level and a tape. Check three things:
- Plumb: Are the jambs vertical from floor to header?
- Level: Is the header flat across the full width?
- Square: Do the diagonals match corner to corner?
If the diagonals differ, the opening is out of square and the door will bind. Fix the framing first. Also confirm the header can carry the door's weight, and inspect for rot, cracks, or loose fasteners in the mounting surface. A workshop door is a structural load, not a trim piece.
Workshop-Specific Structural Load Check
A heavy-duty workshop door transfers load into the header, jambs, and floor anchors in ways a standard residential door does not. Before you order, verify the structure can take it:
- Header capacity: Confirm the header is sized for the door's weight plus the operating load of the barrel, springs, and curtain. A sagging or undersized header will telegraph into binding guides within weeks.
- Jamb integrity: Check that jambs are straight, solid, and anchored to the wall framing, not just the sheathing. Look for rot, splits, and loose fasteners at every mounting point.
- Floor anchors: Confirm the concrete or slab at each guide base is sound and thick enough for the specified anchors. Spalled or thin slabs will not hold wedge anchors under cyclic door load.
If any of these are marginal, fix the structure first. A door hung on a weak frame will never roll clean, no matter how carefully you set the guides.
Plan Your Lift and Clear the Work Area
Heavy doors, high-tension springs, and alignment problems are the three hazards that make DIY garage door work risky, according to coverage of DIY garage door installation hazards. Plan the lift before anyone touches the door.
Clear a work zone at least as wide as the door plus walkway on both sides. For the full sequence from tear-out to final adjustment, review our step-by-step roll up door installation guide before you start.
A practical crew and lift plan for a heavy workshop door looks like this:
- Crew: Two people minimum for the curtain, three for a wide or insulated door. One person calls the count and controls the lift; the others keep hands on the assembly and never let go until brackets are secured.
- Lifting equipment: Use a material lift, a scissor lift, or a pair of sturdy sawhorses at the correct height to stage the curtain. Avoid lifting from the floor if you can stage at waist height.
- Exclusion zone: Keep everyone not actively lifting outside a zone at least the door's width plus 4 feet on each side. No one stands under the door or in the path of the guides during the lift.
Watch out: a door that is dropped or allowed to twist during the lift can bend guides or kink the curtain, and a bent curtain will never seal or roll true.
Here is the crew and lift plan the article recommends for a heavy workshop door.
| Item | Recommendation | Note |
|---|---|---|
| Crew | Two people minimum for the curtain | Three for a wide or insulated door |
| Count caller | One person calls the count and controls the lift | Agree on a stop word before the lift |
| Lifting equipment | Material lift, scissor lift, or sturdy sawhorses | Stage the curtain at waist height |
| Exclusion zone | Door's width plus 4 feet on each side | No one stands under the door |
| Work zone | At least as wide as the door plus walkway | Stage sawhorses and tools outside the fall zone |
Roll Up Door Installation Tools and Materials
The right roll-up door installation tools turn a two-day job into a one-day job. Gather everything before you begin:
- Tape measure, 4-foot level, and a framing square
- Cordless drill with driver bits and a masonry bit set
- Socket set and wrenches that match your mounting hardware
Match anchors to the substrate. Concrete needs wedge anchors; wood framing needs structural screws long enough to bite. Read the manufacturer's installation instructions end to end before the first hole. If you are still choosing hardware, browse the roll up door models and specs we stock so your tools and fasteners match the door.
Measuring the Opening for Your Workshop Doors
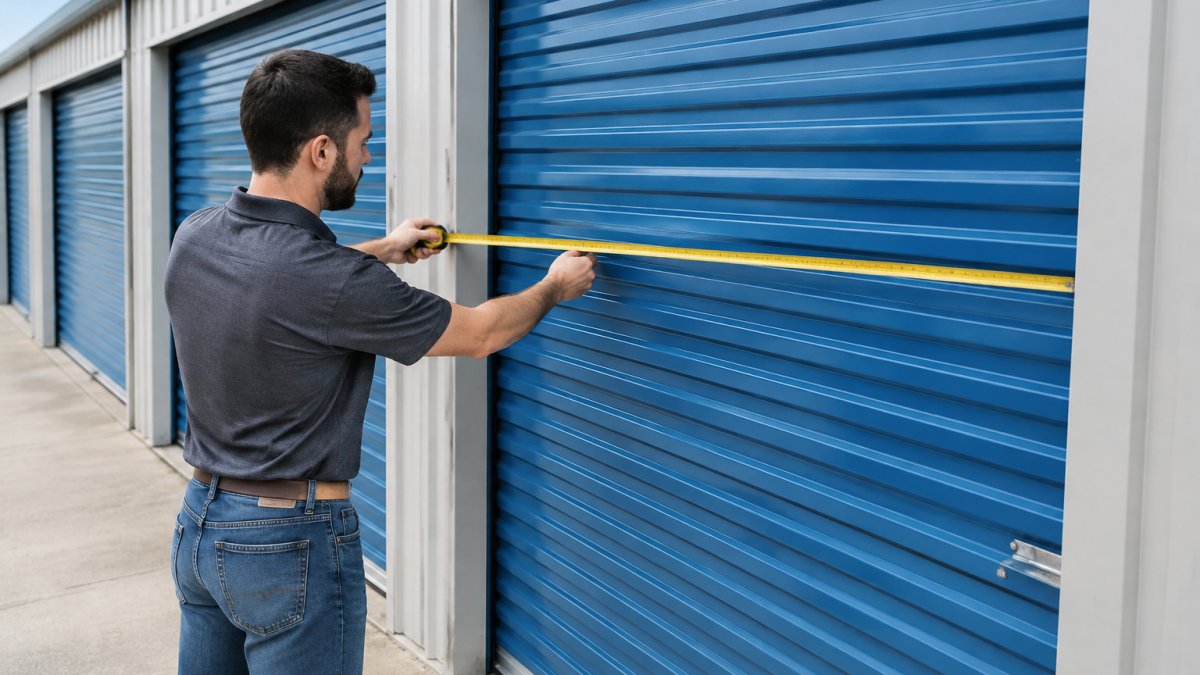
Measure twice, order once. Bad numbers are the most common and most expensive mistake in this job. Record width at the top, middle, and bottom, and height at both sides. Use the smallest reading.
Width, Height, and Clearance
Door width and door height come from the rough opening, not the finished trim. Note the smallest width and the tallest height, then confirm the door you order fits inside those limits with room for the guides. Write every measurement down and keep the sheet with your instructions.
Headroom and Side Room
Headroom is the space above the header; side room is the space beside each jamb. Both must clear the barrel, hood, and tracks. Standard side clearance runs between 4 1/2 and 7 inches depending on track and door type, per installer discussion of garage door clearance. Measure headroom to the nearest obstruction, including ceiling joists and openers. If either number is tight, call before you order.
Mounting the Guides and Brackets
Guide rails set the door's path, so this stage decides whether the door rolls smooth or scrapes. Work from the centerline out and check level at every step.
Positioning the Guide Rails
Mark the door's centerline on the header. Set each guide rail the same distance from center, then check plumb with a level. The rails must be parallel to each other and square to the header. Clamp them in place and test the spacing with the door curtain before you drill.
Securing Brackets and Supports
Drill pilot holes, then drive fasteners straight and snug. Do not over-torque; crushed rails cause binding. Add supports at the header and at the floor anchor points. Give every bracket a firm shake. If anything moves, add a fastener now, not after the door is hanging.
Lifting and Securing the Door Assembly
Lifting is where most injuries happen on this job. A standard garage door weighs between 100 and 400 pounds depending on size, material, and insulation, per garage door weight guidance. Treat every panel as heavy.
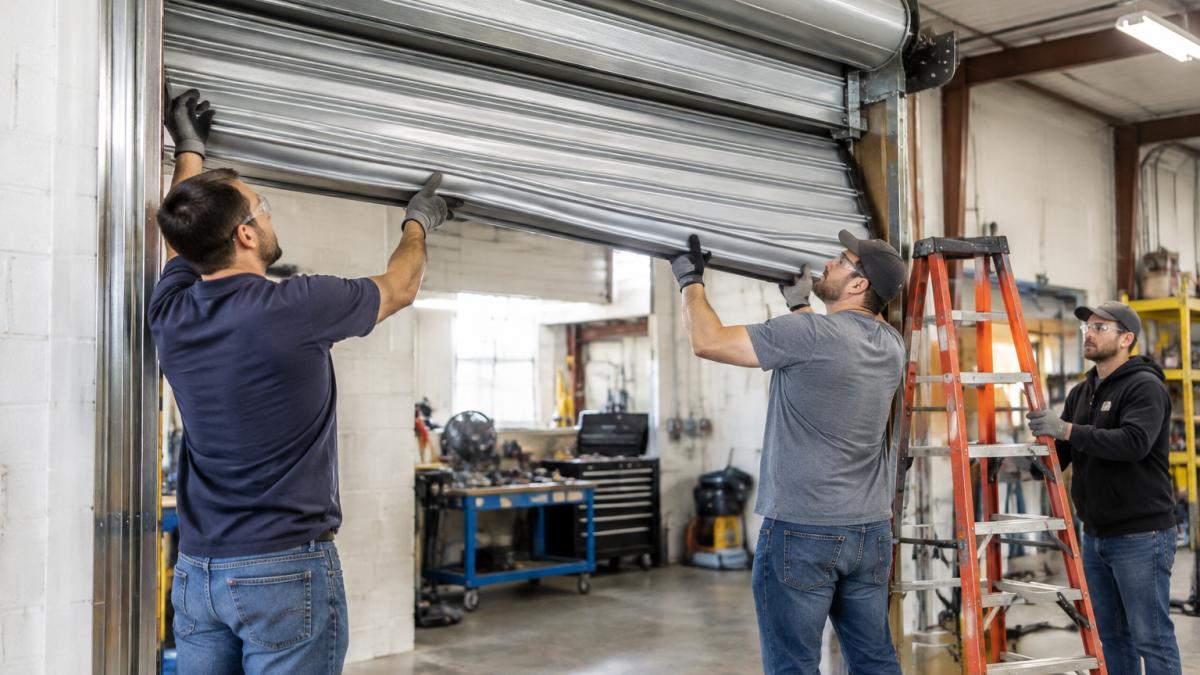
Follow this order:
- Set the ladder and confirm it is stable.
- Lift the door assembly square, with one person calling the count.
- Slide the curtain into the guides from the bottom.
- Hold, align, and secure the brackets before anyone lets go.
- Check that the curtain sits even in both rails.
Pre-assembled doors cut this stage down sharply. Our guide to preassembled roll up door installation time factors explains where the time savings come from.
Commercial Roll Up Door Installation: Electrical and Opener Integration
Commercial roll up door installation adds one more layer: power. A powered workshop door is a system, not just a door with a motor bolted on. Plan the electrical and opener integration before the door goes up so the controls, safety devices, and door travel all work together.
Power Requirements and Circuit Planning
Confirm the opener's voltage, phase, and amperage from its nameplate and manual before you run any wire. Most commercial roll-up openers run on dedicated circuits, and some models require a disconnect within sight of the door. Keep wiring in conduit and let a licensed electrician make the final connections and confirm the circuit is properly grounded and protected. Do not share the opener circuit with shop equipment that cycles on and off; voltage dips can cause the opener to stall or lose its limits.
Opener Compatibility and Mounting
Match the opener to the door's weight, drum size, and cycle count. A heavy-duty workshop door that cycles dozens of times a day needs an opener rated for that duty, not a light residential unit. Mount the opener per its manual, keeping the drive mechanism aligned with the door's barrel and clear of the curtain path. Confirm the manual release works and is reachable, and that the opener's travel limits can be set without straining the door at either end.
Controls, Safety Devices, and Commissioning
Wire the controls and safety devices before you power the door for the first time:
- Control station: Mount the open/close/stop station where the operator can see the door through its full travel.
- Safety reverse: Test the safety reverse before the door sees daily use. The door must reverse on contact with an obstruction at the floor.
- Photo-eye or edge sensor: If the opener uses a photo-eye or edge sensor, confirm it is aligned and that the door will not close when the beam is blocked.
Watch out: an opener that is wired to the wrong circuit or set with travel limits that overdrive the door will damage the curtain and guides, and the failure often shows up as a binding door rather than an electrical fault.
Insulation choice affects opener load and seal performance. Compare insulated vs uninsulated roll up doors for commercial use before you finalize the order, especially on climate-controlled bays.
Roll Up Door Tension Adjustment and Balance Check
Roll up door tension adjustment is the step to leave to a professional if you are unsure. Springs store serious energy. With the door down, disconnect the opener and lift the door halfway by hand. A balanced door stays put; one that drops or climbs needs adjustment. Follow the manufacturer's tensioning procedure exactly, use the right winding bars, and never loosen hardware under load.
Your Roll Up Door Installation Diagram: Post-Install Checks and Sealing
Run a final pass against your roll up door installation diagram and the manual. Then check:
- Door opens and closes by hand without binding
- Curtain sits even in both guide rails
- All brackets and anchors are tight
Seal gaps at the jambs and header with exterior-grade sealant. A clean seal keeps weather, dust, and pests out of the shop. When you are ready to order or want guidance on specs, browse our commercial door lineup.
Frequently Asked Questions
Can one person install a heavy-duty workshop door?
A single person can handle measuring, mounting guides, and attaching brackets, but lifting the door assembly is a two-person job at minimum. Doors vary widely in weight depending on size, material, and insulation, and heavy-duty workshop doors are typically among the heaviest. A dropped curtain can cause serious injury. Use a lift assist or a second set of hands for the lift, and never stand under a partially raised door.
How long does it take to install a commercial roll up door?
Installation time depends on the door, the opening, and crew experience. Commercial roll up door installation can run longer when you are adding an opener, running electrical, or fitting multiple doors in a row. Plan a full day for your first door and less for each one after that.
How do you tension a rolling steel door safely?
Roll up door tension adjustment should happen only after the door is fully mounted and the curtain is seated in the guides. Follow the manufacturer's instructions for your specific model, keep hands and tools clear of the spring and barrel, and use the winding bars supplied with the door. If the door feels heavy, binds, or will not stay at the halfway point, stop and call a qualified technician. Torsion springs store enough energy to cause severe injury, so this is not a step to improvise.
What tools are needed to install a commercial roll-up door?
A basic roll up door installation tools list includes a tape measure, 4-foot level, plumb line, drill with bits for your mounting surface, socket and wrench set, screwdrivers, tin snips, a ladder, and safety glasses and gloves. Add a lift assist or a second worker for the door itself. For tension work, you need the winding bars that come with the door. Check the roll up door installation diagram that ships with your model so you know which fasteners go where before you start.
Heavy duty workshop doors reward careful prep and punish shortcuts, especially at the lift and tension stages. If you would rather start with a door built for fast installation, Roll Up Doors Direct offers pre-assembled designs, customizable sizes, and certified wind load rated options, all shipped nationwide at factory-direct pricing. Get started with Roll Up Doors Direct and put a door on your shop that installs clean and holds up for years.